
Making your embroidery into a patch!
There are many ways to create embroidered patches to sew onto clothes, bags etc
In this post I’m going to show you how to turn an existing piece of embroidery into a patch.
I like this method as it means that you can stitch your embroidery normally on whatever fabric you want, in your hoop, and don’t have to decided if you want it to be patch till you are done!
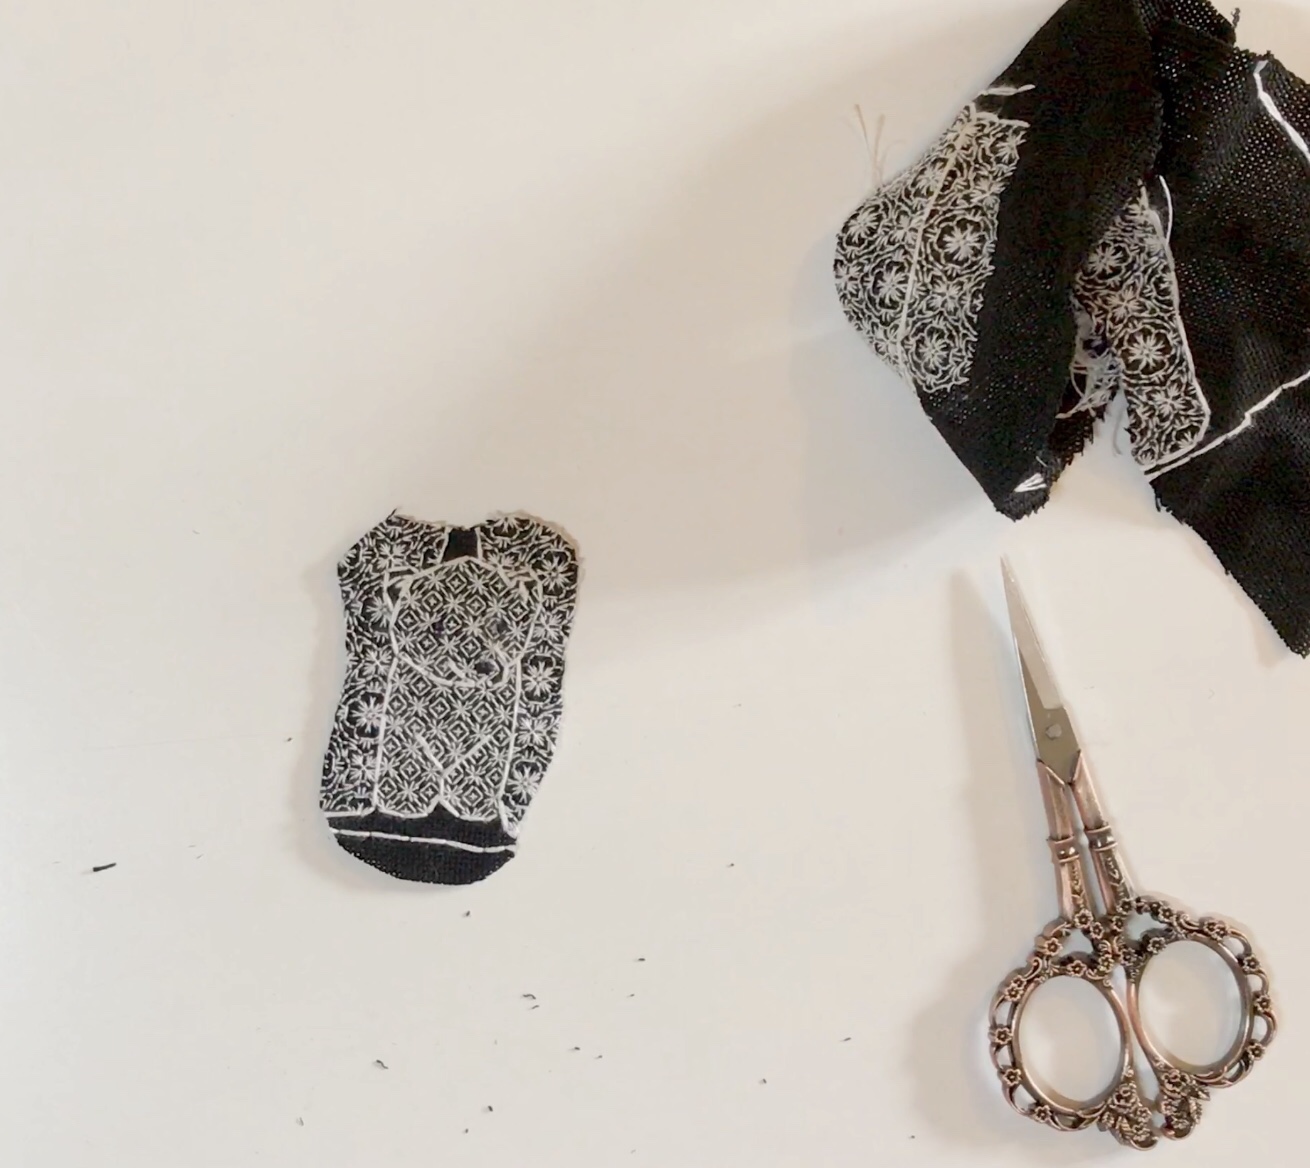
Cut out your embroidery
The first thing you need to do is to cut the excess fabric around the embroidery you want to make into a patch to leave a 1-2cm border around the motif. Try to make the patch a nice shape which may not be the exact shape of the stitching you’ve done but will frame it (a bit like a round embroidery hoop frames designs that aren’t quite round themselves).
Its always best at this stage to leave more of a border than you think you need. You can always cut it down later on in the process. If your fabric is prone to fraying (like the evenweave I am using in these pictures) then leave a little more excess fabric to compensate for that too
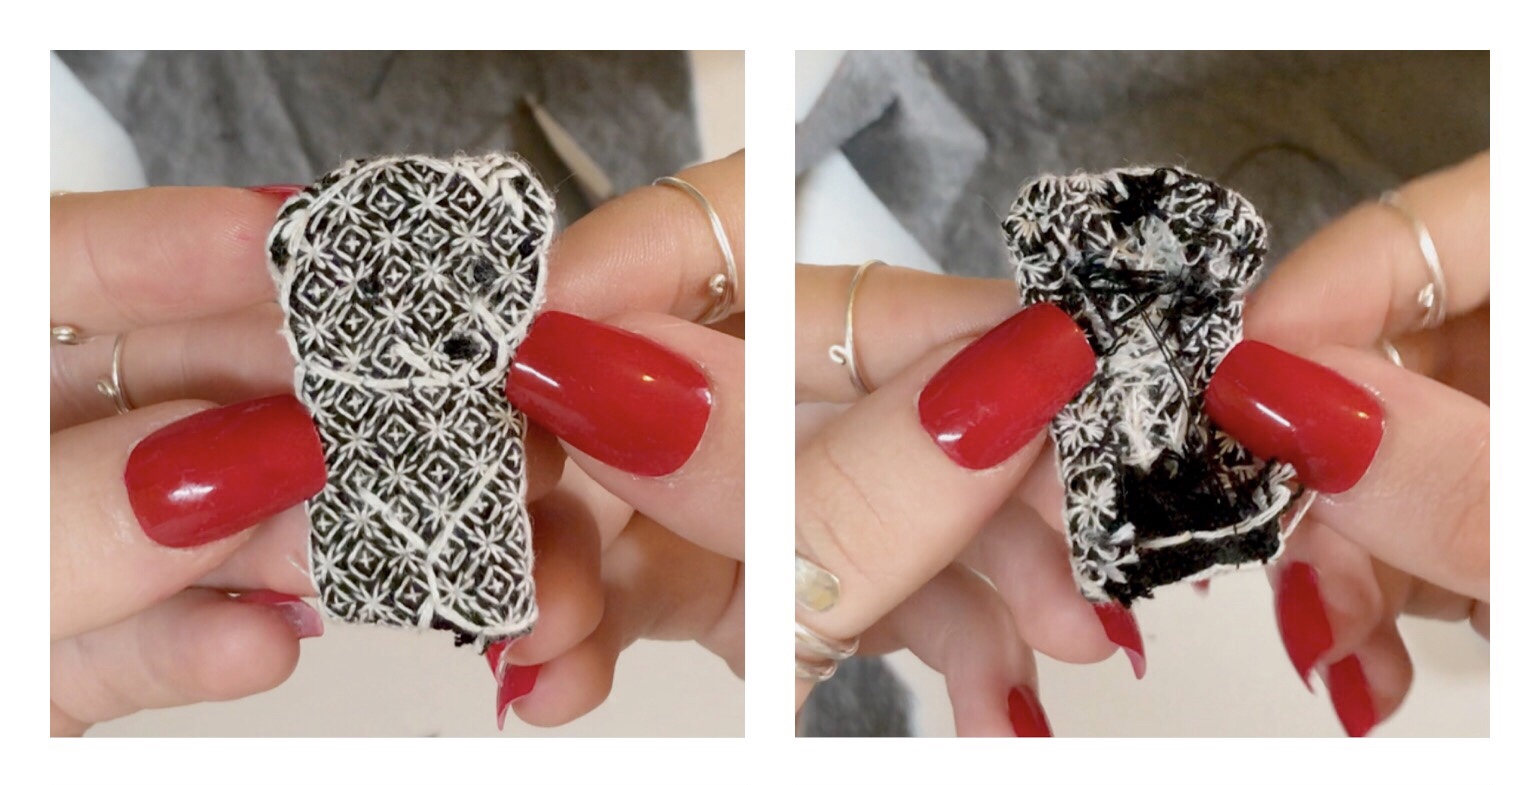
Folding in your edges
The next step is to get those raw edges under control!
To do this; fold one part of the border along the line of the edge of your embroidery and tack it in place at the back of the stitching i.e. fold and tack all of the fabric excess to the back of the embroidery so that only the stitched motif is still showing.
Continue in the same way around the whole edge of the embroidery until all the raw fabric edges are tacked to the back.
Dont worry about all of the frayed bits that may have appeared or that the back looks a mess at this stage. The next step will sort all of that out!
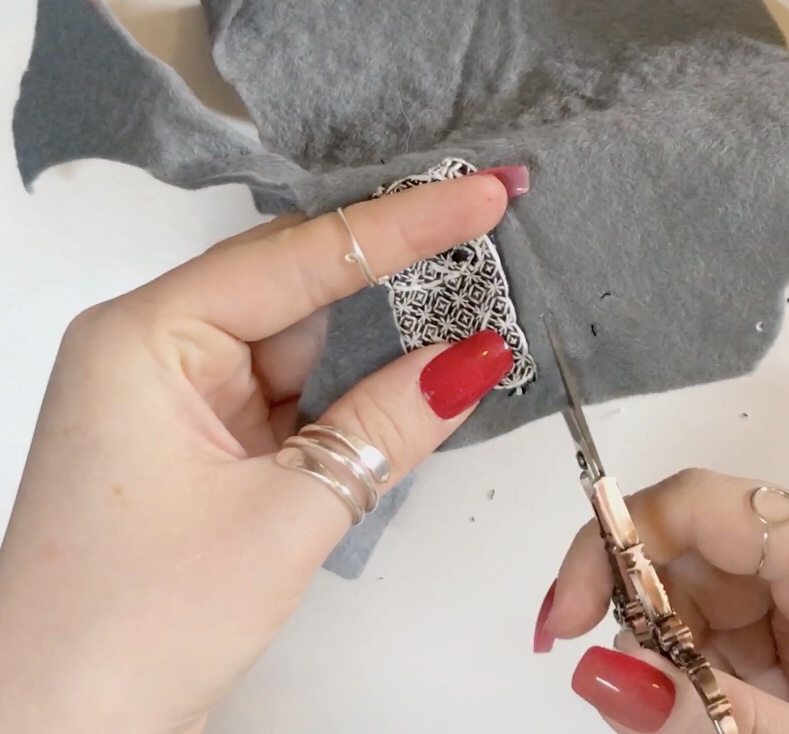
Cut a matching piece of felt
You now need to cut a piece of felt the same size and shape of your ‘hemmed’ embroidery. The easiest way to do this is to place the embroidery over a pice of felt and then cut round it. Or if you don’t want to get your scissors that close to your embroidery you could always trace round it and then cut round the outline!

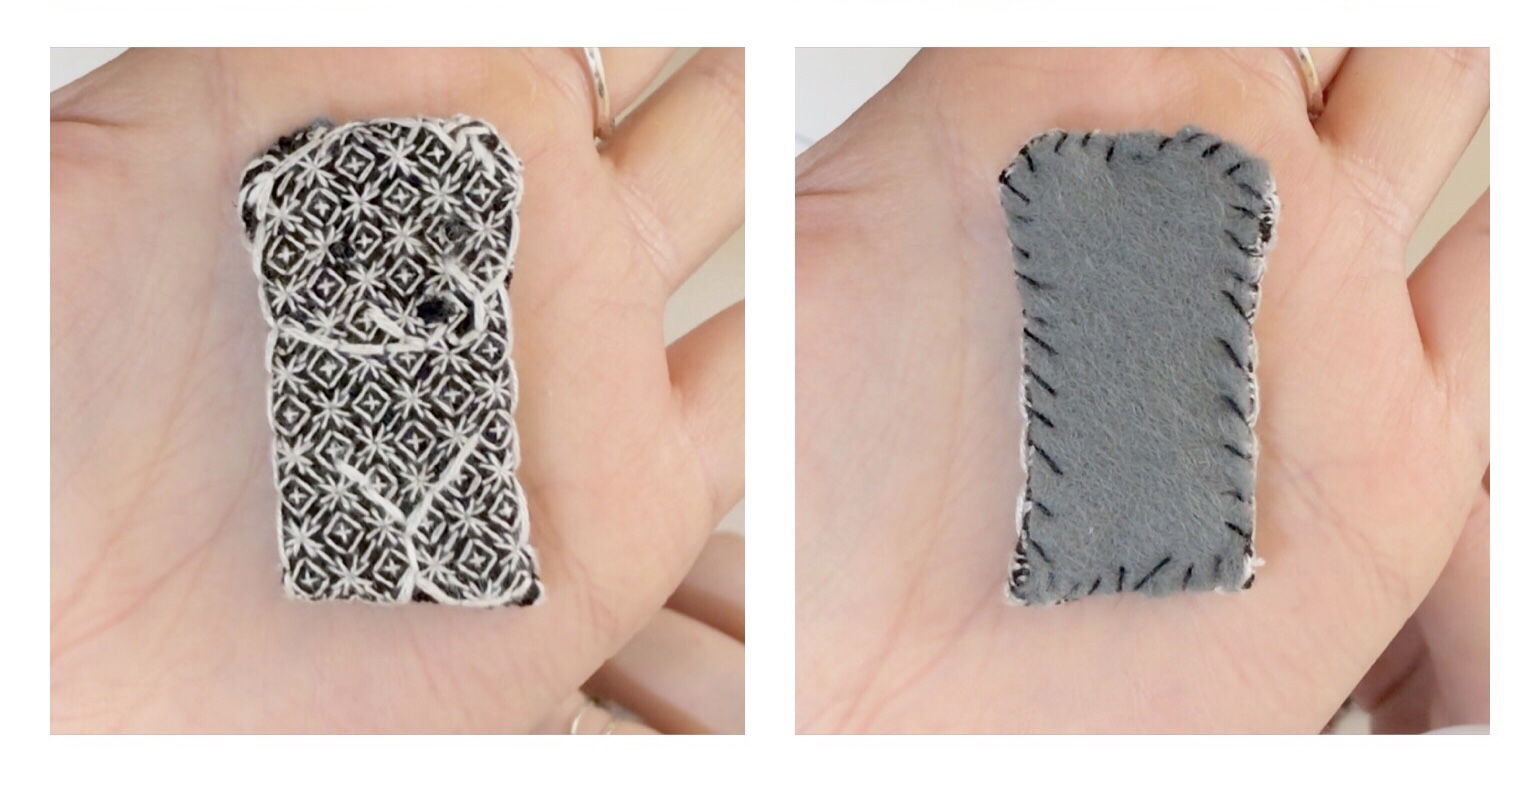
Stitch your felt piece to the back of your embroidery
To stitch your felt to the back of your embroidery push your needle through the felt to emerge at the edge of your backed embroidery piece, try not to let the needle emerge at the front of the embroidery as this will show on the front of the patch. You need make sure that the needle pierces all three layers of fabric and felt each stitch to avoid any frayed ends being able to escape later.
The more likely your fabric is to fray the closer together I recommend making your stitches at this stage. The more stitches you make round the edge, the less likely any frayed ends are to escape.
You may also notice that I have chosen a thread colour to match the fabric I embroidered on and not to match the felt. The reason for this is that I don’t want any of the stitches I am making at this stage to show once the patch is complete. It also doesn’t matter if the stitches show on the felt side as that is the side that will be against whatever it is you decide to sew your patch too so won’t show in the end anyway!
(Now, I could have also chosen a matching felt for this but I wanted you to be able to see my stitches at the back so its a little clearer what I’m doing.)
Your patch is now complete!
But there is still one more thing to do… work out where to put it!
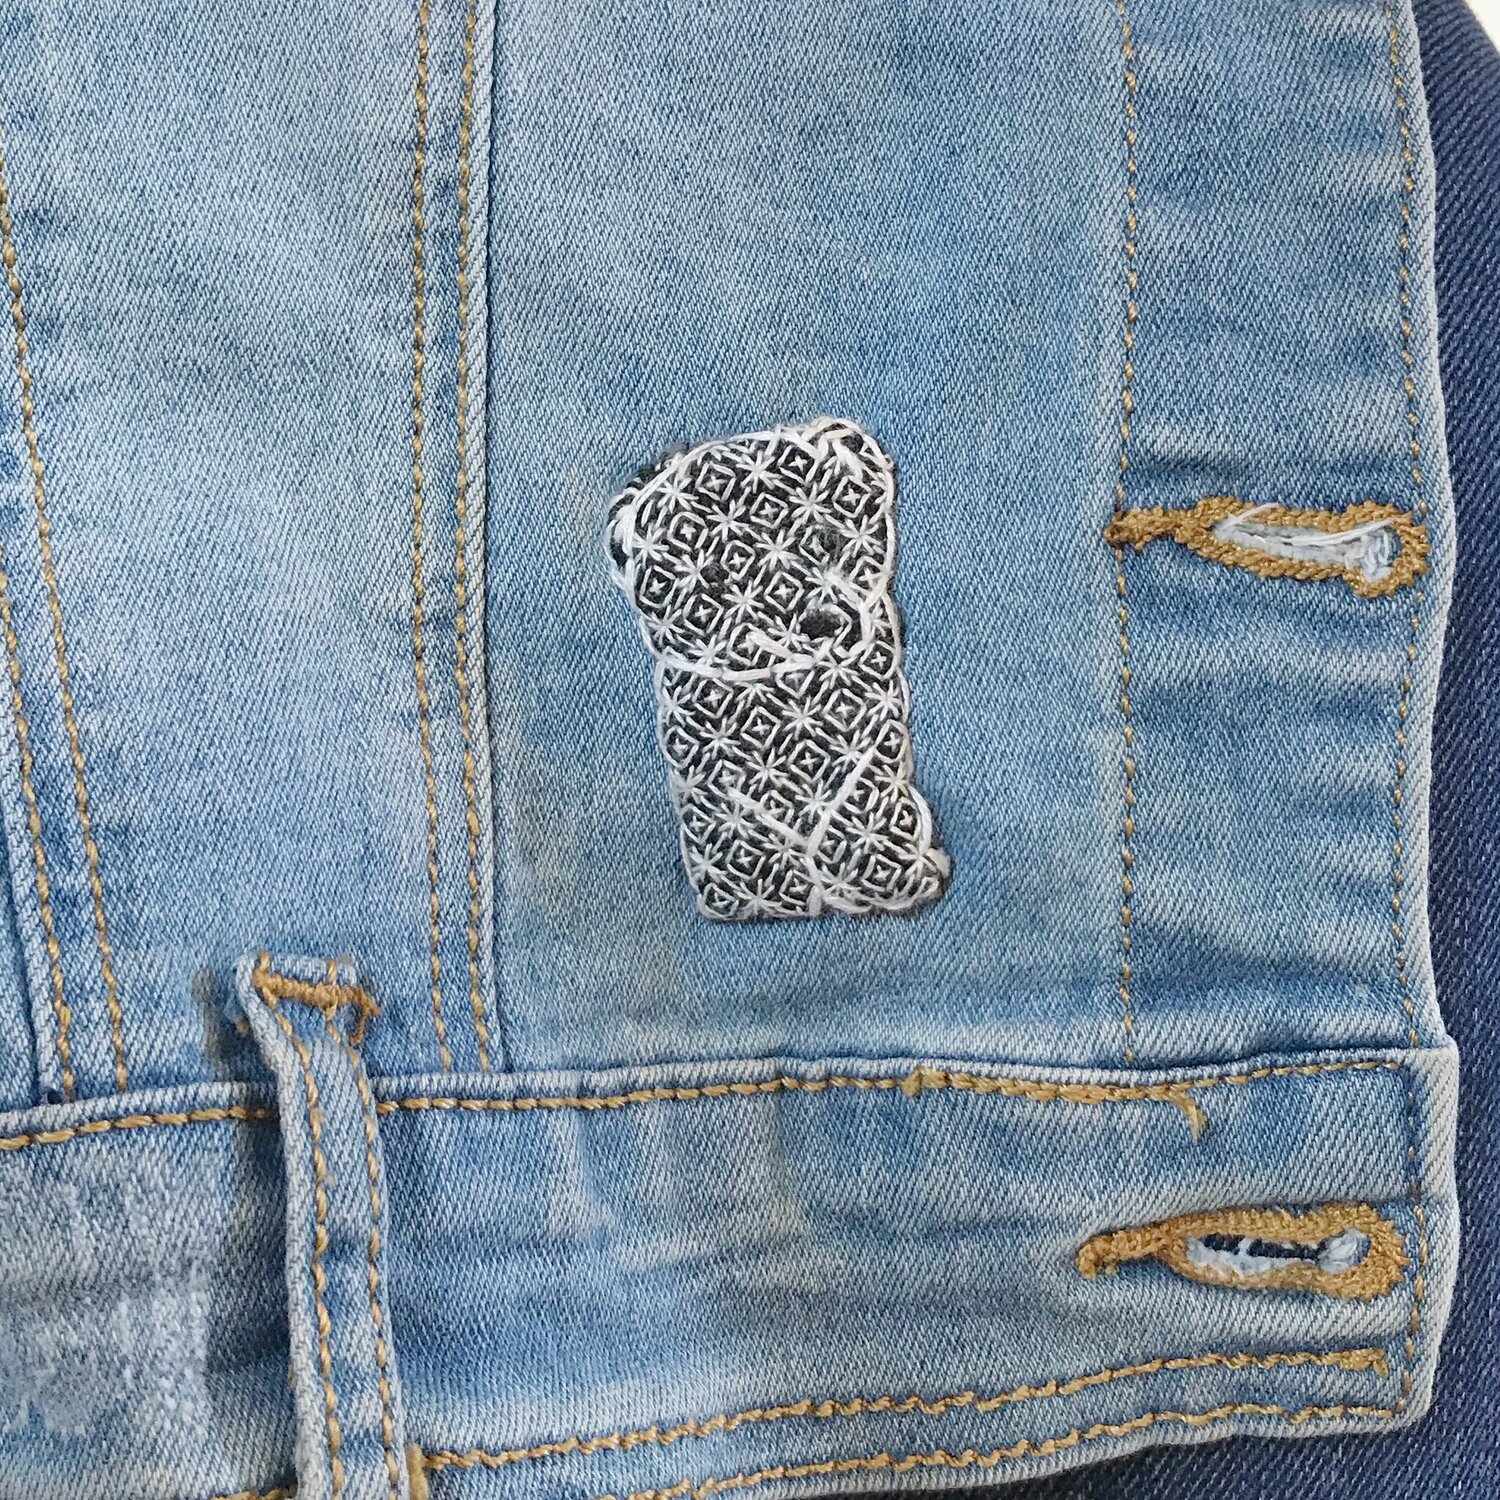
I chose to sew mine to my denim jacket which I fully intend to remain a work-in-progress as long as I own it!
Here’s a helpful little video I’ve made of the process for you!
I’ve tried to slow down the important steps and speed up the bits in between to keep it a nice length
I’d really love to see what you make!
If you stitch a patch using this tutorial, show me what you make on instagram by tagging me and using #purplerosestitchers so I can share your lovely creations!
Any questions, drop them in the comments section below