Creating circles in blackwork embroidery
One of the difficulties of working on a square grid as you do with counted embroidery such as Blackwork is creating those smooth curves and circles that some designs just need.
I’m going to explain a little about why circles are so difficult and a few things I think its useful to know about this shape before trying to stitch it.
I’ve also put together some of the tips I have for getting a smooth curved edge to help you create your own designs!
At the end of this post I’m going to share 3 of my own favourite Blackwork circle patterns! They have appeared in my work either as components of other repeating patterns or isolated (like the bubbles in the blackwork whale design)

Size matters!
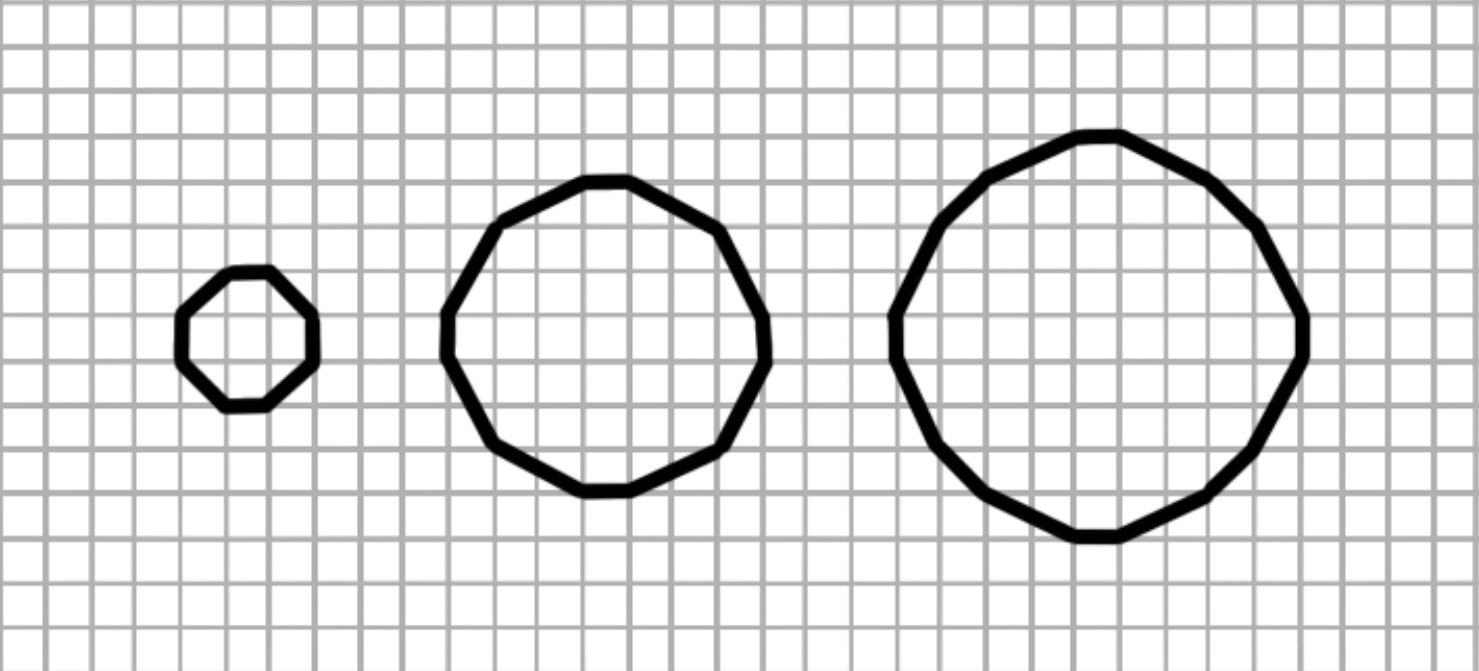
In short: the bigger the circle or curve, the smoother the line you will be able to create.
On the same grid, when stitched only through the holes in the fabric, the smallest will turn out much more jagged than the largest. This is because more points on the large circle actuallly hit holes in the fabric (shown here by the intersections on the grid). The more holes in the fabric that the edge of the circle hits, the more gradual the direction change of the stitches will be and the smoother the end result.
The size of the fabric you are using can also play a role in this!
The count of the fabric represents the number of holes there are per inch. For example 20 count (my go too) has 20 holes per inch whereas 14 count has… you guessed it! Just 14.
When wanting to achieve smoother curves and greater levels of detail within the same space, going for a higher count is always best!
To take the example of circles again: a 1 inch circle on 14 count will hit far fewer holes in the fabric than on 20 count. Therefore to achieve a smoother curve the higher count fabric will help.
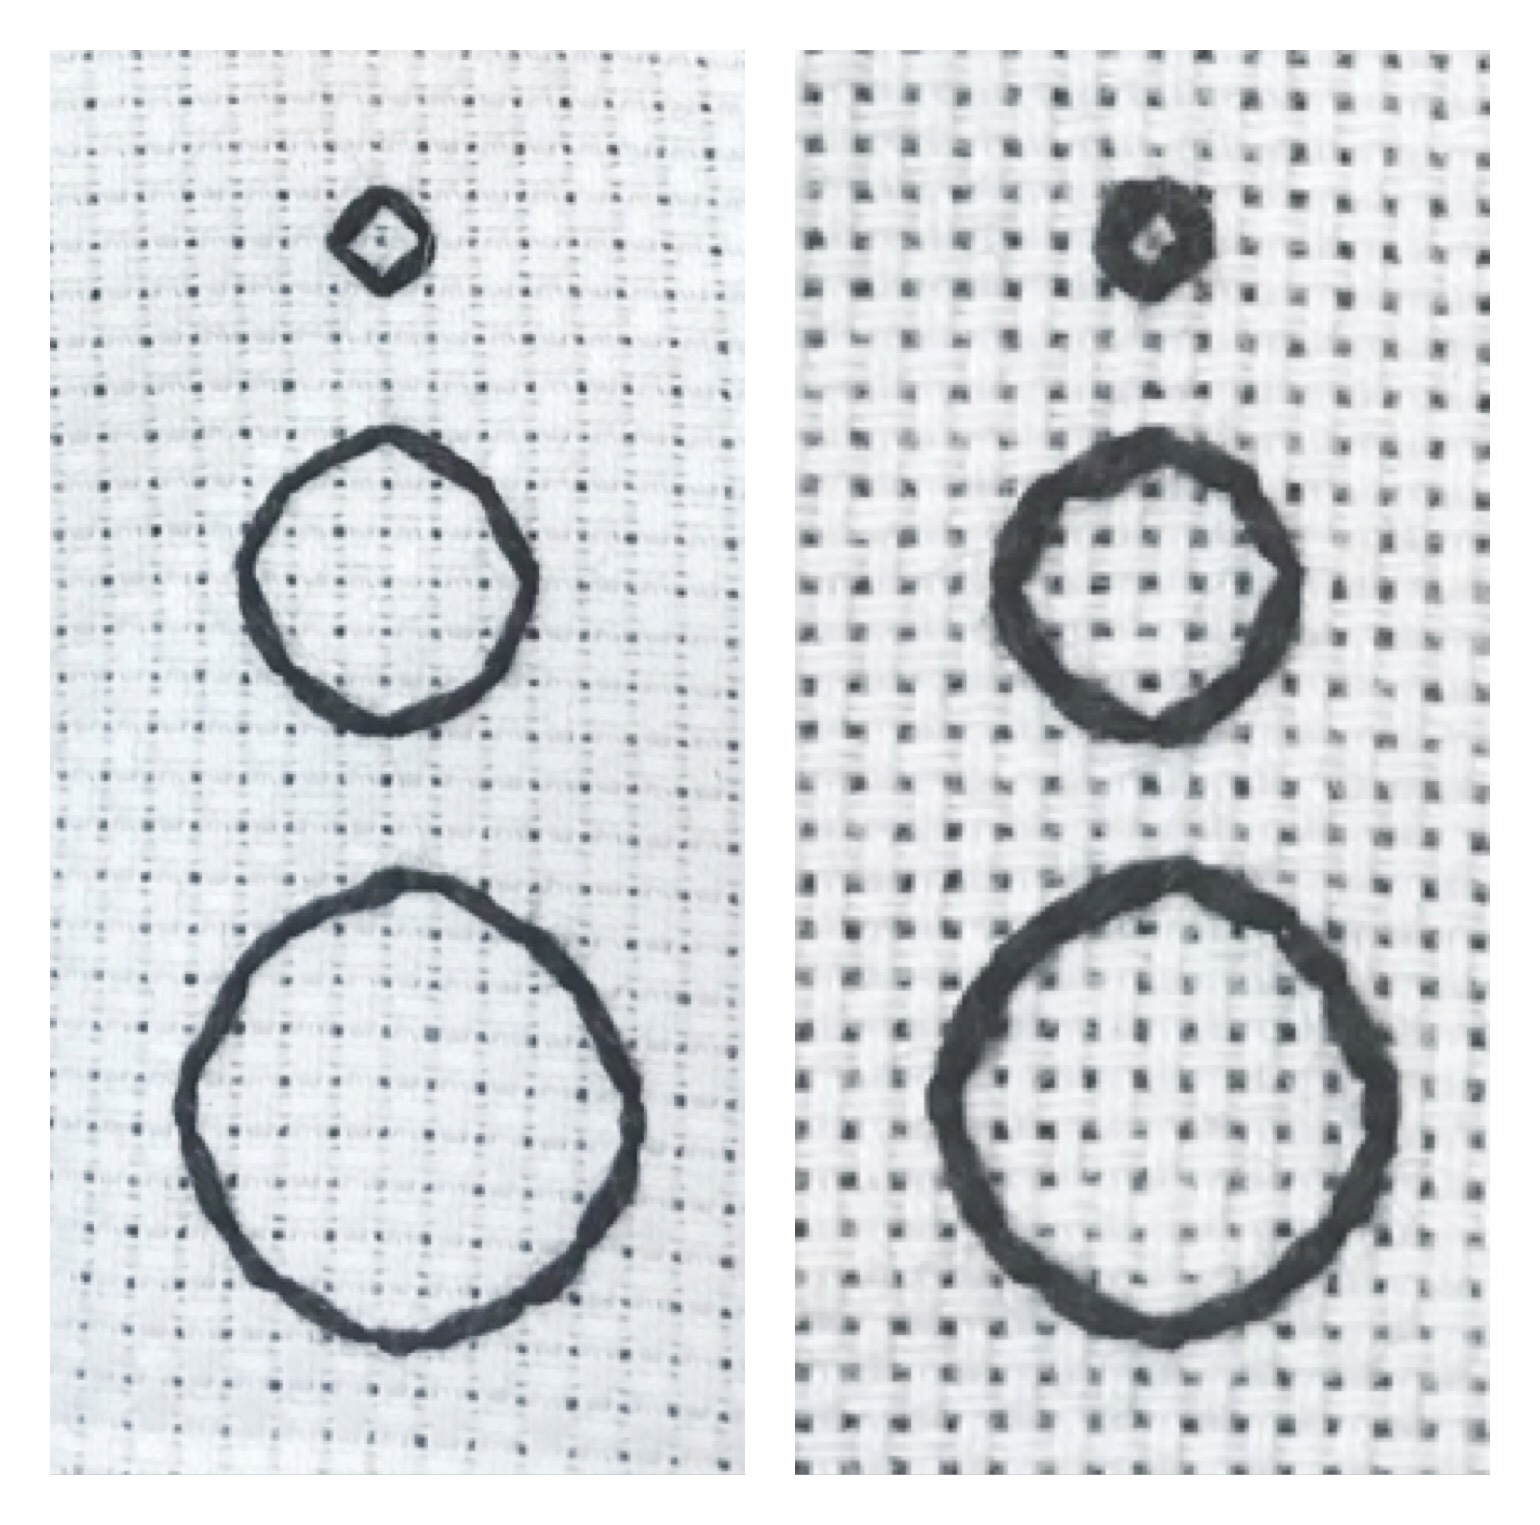
You can clearly see with this stitched version that the smallest circle has pretty much ended up as a square! Not ideal
the largest circle is about as smooth as its going to get on a square grid and its actually pretty close to round.
the photo on the left shows the circles stitched on 14count and on the right the same circles are stitched on 20count. I am using 3 strands of thread in each photo. Using a higher count fabric definitely makes the lines smoother!
How to draft your own circle pattern
Right!
Now that I’ve got the slightly more technical explanation out of the way I’m going to talk you though how to stitch a circle or curve of your own…
Lesson number 1 is symmetry!
Obviously circles are symmetrical all the way around but on a square grid they have far fewer lines of symmetry.
I like to divide my circles into quarters; horizontally and vertically. This helps me to make sure that my circle will stay round and wont accidentally end up as an oval or anything like that! As long as you make sure that all 4 sections are stitched identically, you should have a nice round circle at the end of it.
Thinking of a circle as having 4 sides is weird at first but I promise, it will really help with this!
lesson number 2 is softening the change in the direction of your stitches.
Now, what I mean by this is that when you change from a horizontal/vertical stitch to a diagonal, do it in more than one stage. This is much easier when stitching bigger circles and on higher count fabric (one of the reasons I recommend them).
So for example: instead of going from a line straight across to a line perfectly diagonal, try going 2 holes across and 1 down for one stitch, then go diagonal. This should really help to soften your lines, just make sure that you repeat this symmetrically on all 4 sides of the circle.
Lesson number three is use a thicker thread.
Ok, so this one is down to aesthetic preference as opposed to necessity but bear with me here…
The thicker your thread is (the more strands you use) the smoother the line you stitch will become. The changes in stitch direction wont look so stark and you will end up with cleaner lines. I would recommend 3+ strands of floss to really take advantage of this effect.
My 3 favourite circle patterns
Here are three of my favourite circle patterns that I use both in my filling pattern and elsewhere in my stitching!
To really get the hang of what I’ve been trying to explain, why not take a piece of fabric and have a little experiment… Try stitching them up using different numbers of strands of thread, on different sized fabric.
One you’ve got the hang of that, and seen how to manipulate the curves for yourself, you should be all set to put what you’ve learn into practice!