Creating an original design
This is something that I know a lot of people struggle with.
It’s hard to know where to start sometimes, and even harder to know if what you’ve created looks right!
I’m going to take you through the steps I use to create my designs before I even start stitching:
Looking for inspiration images
Drawing the elements of the design
Playing with composition
Thinking about colours
Look for inspiration images
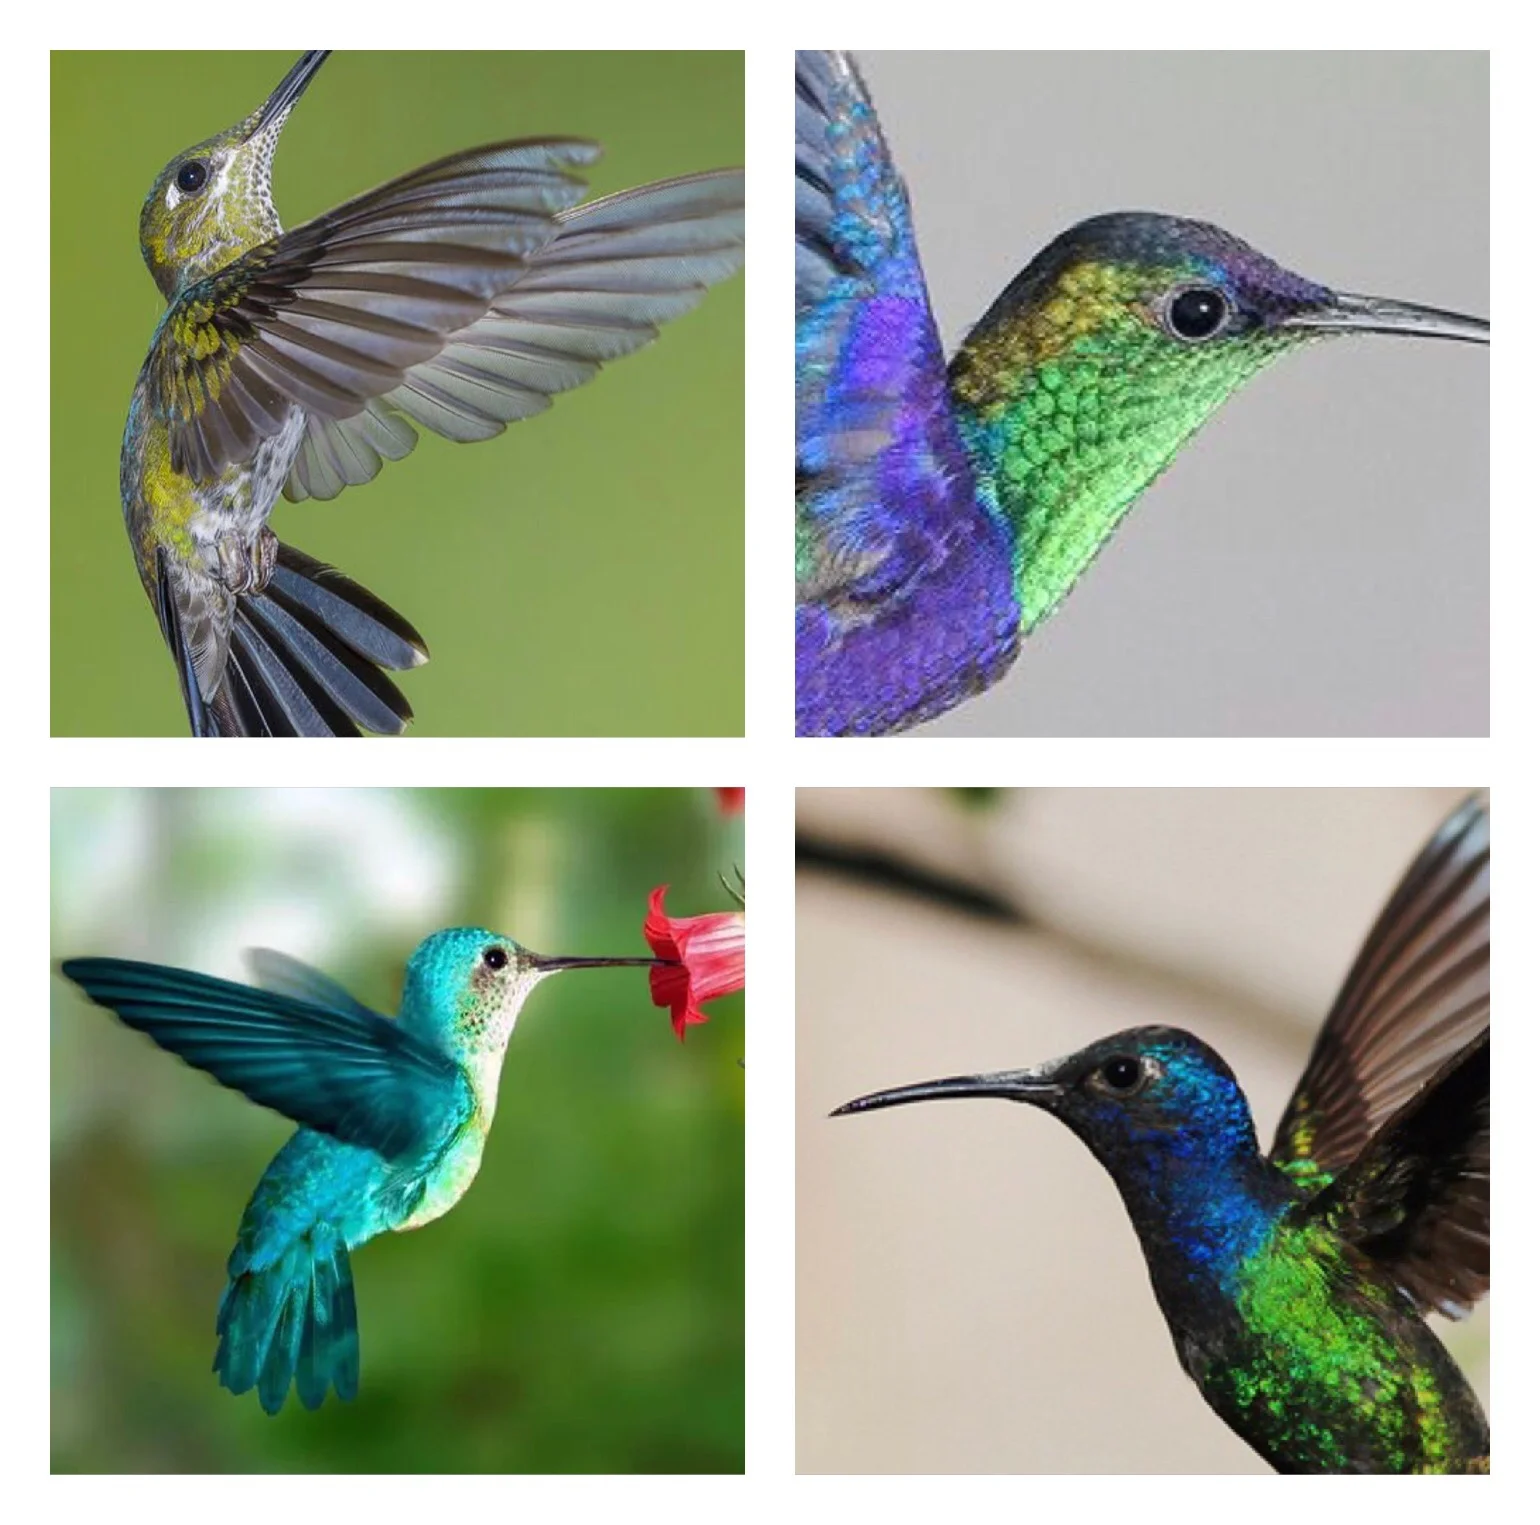
For a single design I would recommend at least 4 images per design element.
For this example of a hummingbird, I took at least 4 images of hummingbirds and 4 images of the flowers I added later as well.
The more images, the easier it is the create a true to life drawing with ‘copying’. You will find it easier to really get a feel for the subject you are drawing.
If you can take your own photos or better still have what your are drawing to hand that’s great! As for other sources, I recommend Pinterest for reference photographs of plants and animals. I’m sure that google images would do the job nicely too.
Draw all the elements Separately
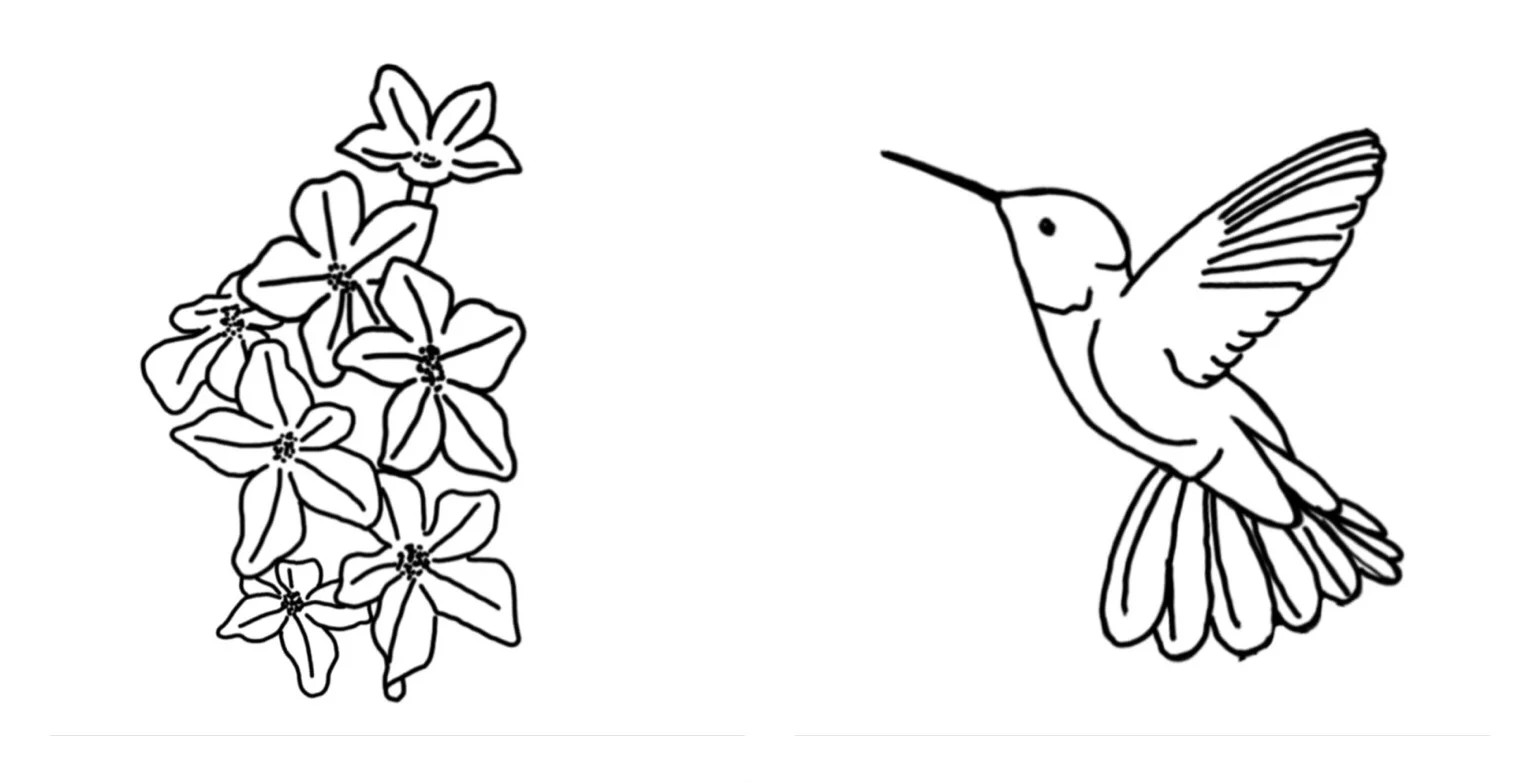
I draw all of my design digitally, using an Apple Pencil and iPad Pro. It means that I can move all the parts of my design around and resize etc as I go.
It is the best set up I have found and I can’t imagine making my designs any other way at this stage but I understand that not everyone can afford such things.
If you are working on paper, why not try drawing all the elements on separate pieces and cut them out. You will want to be able to move your elements around separately in the next stage.
Play with your composition, thinking about framing
All I do here is move the elements I have previously drawn around. I have also duplicated and flipped one in the top right composition and drawn in a freehand element in the bottom two.
The reason for that is all to do with framing!
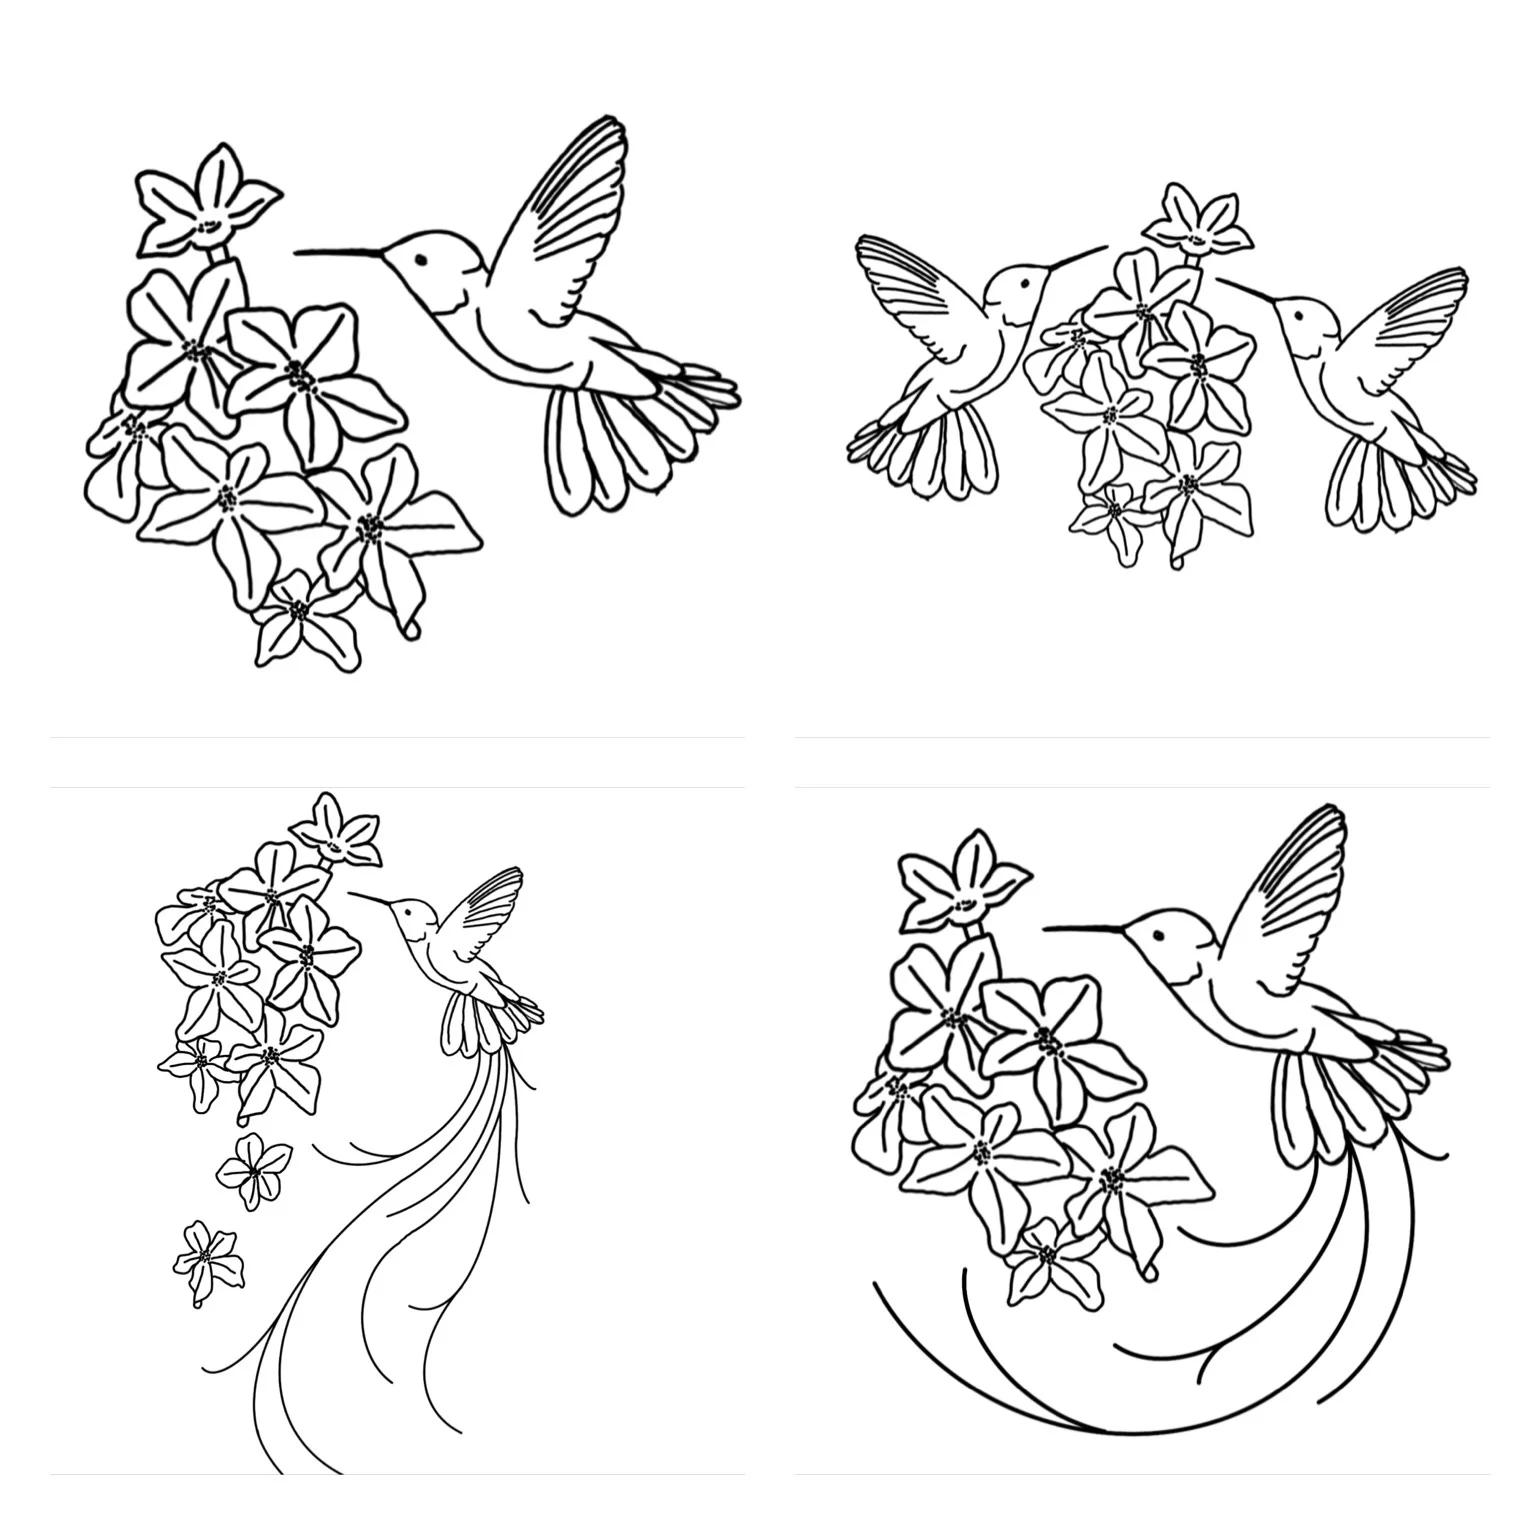
The top left and bottom right design are clearly intended to be stitched and framed in the round. With the bottom right version I decided to add the freehanded long tail to echo this framing choice.
The top right design is intended for a landscape oval hoop/frame.
The bottom left design is intended for a portrait oval frame and I have added both more flowers and a freehanded tail to help it fit this.
Think about your colours
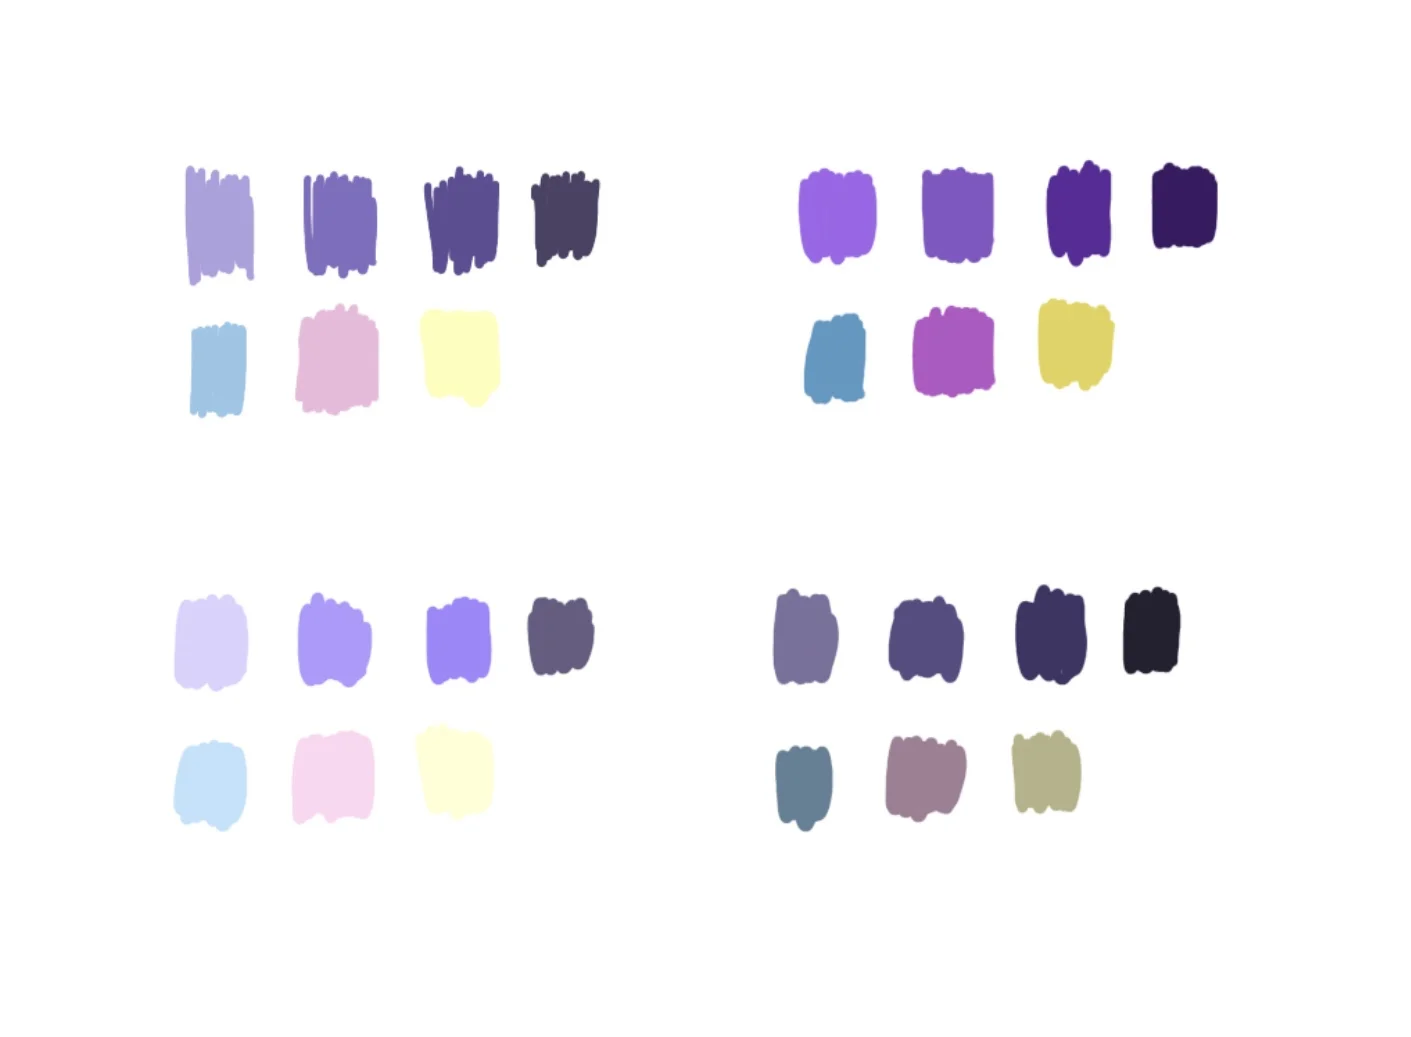
Put together several versions of your intended pallet.
Try brights, muted, pastels, true colour… As with the composition, just play around until you find the one you are happy with!
Obviously your colours should all be based on your reference photos that you started with. If you want a more true to life colour for you piece then match your colours directly to these photos but if you prefer to adapt the colours to to ones that more fit your style then try out a few before you settle on your favourite!
So I hope that as helped enlighten you to a bit of my process!
For those who might be wandering, I chose to use the bottom left composition with the top left colour pallet.
Though I may well come back to another of these compositions at a later date…
As ever, pop any questions down below and I will do my best to answer them for you!